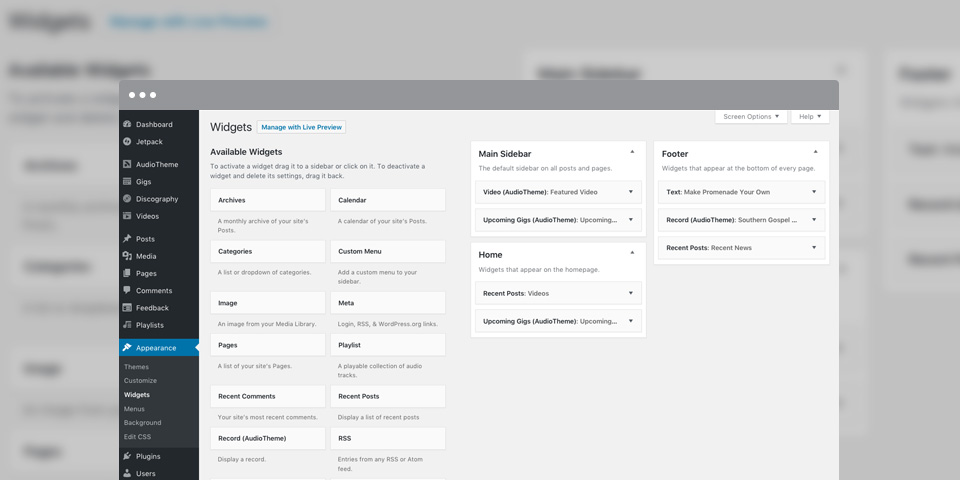
Sidebars and widgets are a great way to extend the functionality of WordPress. They give your audience a chance to find important information in a prominent location.
While widgets and sidebars work great on a typical WordPress install, we have a few tips to share that can make your site appear more polished. By using custom sidebars and widget visibility options, you’ll also gain more control over when and where you’re sharing information.
What are sidebars and widgets?
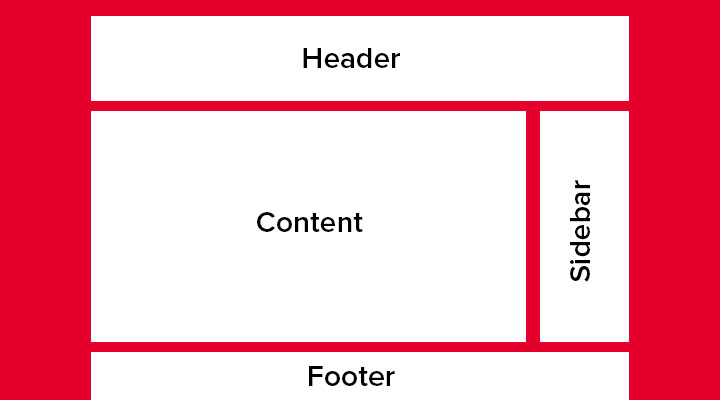
Sidebars are part of a WordPress theme that are not part of the main content. They’re typically found on the left or right sides of the main area of the site. Sidebars are widget ready, meaning you can place widgets in them to customize the look and feel of the information being displayed. Sidebar locations vary from theme to theme, but typical sidebar layout looks like this:
Widgets are small blocks of content that nestle into sidebars or other theme-defined widget areas. See Promenade’s homepage grid or footer widget area for an example.
WordPress includes several widget options by default, which can be managed under Appearance → Widgets. If you have the AudioTheme Plugin installed, you’ll have the option to add several more including:
- Record
- Upcoming Gigs
- Video
- Recent posts widgets (used to display several records or videos)
Additional plugins provide even more widget opportunities, with mailing list signup forms and social media feeds being some of the most popular.
You’ll notice when you first install WordPress that the default sidebar usually contains a few widgets. If you’re using WordPress for a music website, odds are you have already gotten rid of several of these. You’ve probably even added more practical widgets to your site, but may find yourself wanting more control over which widgets show on each page. In fact, “how can I display WordPress widgets on specific pages?” is a common question we’re asked in support.
With a few plugins and settings, you can have complete control over when and where different sidebars and widgets display on your WordPress website.
Custom sidebars
Sidebars are a great way to display important information on your site. They display in locations where site visitors are accustomed to looking. Sidebars make a great place to share recent news or upcoming shows. However, there are times when you may wish to have different sidebars for different areas of your site. An example of this would be a site that has one sidebar for main pages, and another for the blog section. It might not make sense for every page on the site to display blog categories or a tag cloud, but those might be features you want on your blog. Creating two different sidebars is a nice way to place this information only on the pages you want it.
To do this, you can use a plugin called Simple Page Sidebars.
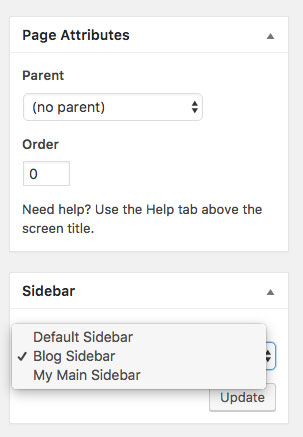 Simple Page Sidebars allows you to create multiple sidebars and assign them to different pages. You can do this by navigating to the page you want to show a custom sidebar on, creating a new sidebar, and adding widgets to it.
Tip: You can’t assign a sidebar to individual posts, so it’s best to assign the sidebar you want to display on posts as the default sidebar.
After you’ve created several sidebars, you can assign one to each page, overriding the default sidebar.
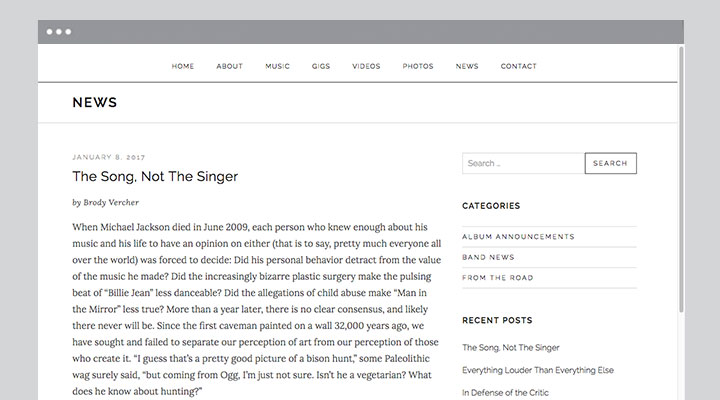
The results can be a blog page sidebar that looks like this:
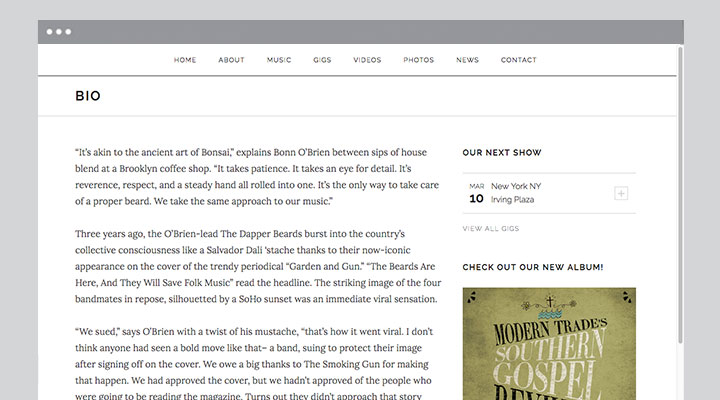
And a completely different sidebar for other pages:
Potential Uses
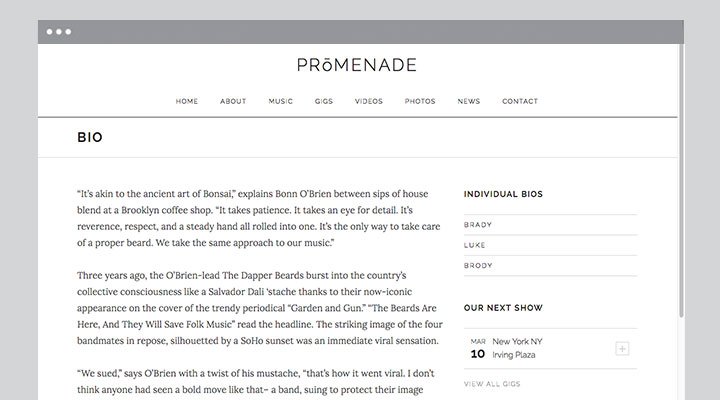
There are a ton of different possibilities when it comes to having different sidebars on your site. In addition to having separate sidebars display on your blog pages vs regular site pages, you can extend the organization and depth of pretty much any page with custom sidebars. An example of this might be having a link to the band’s bio in the main navigation, and using a custom sidebar with a custom menu to link to individual bios from the sidebar.
Using widget visibility for even more control
If instead of having completely different sidebars on pages, you just want to change a few widgets, you can use the Widget Visibility module of the Jetpack plugin. This allows you to show or display a specific widget using a set of conditions.
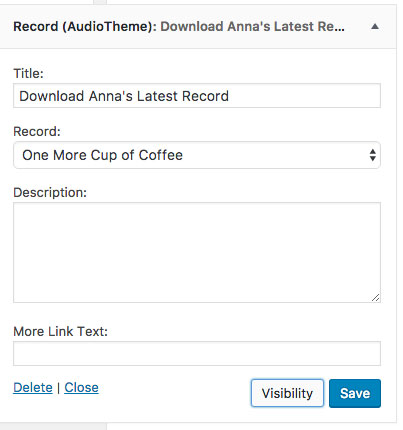 After you’ve installed and connected Jetpack, you can switch the widget visibility option on under Jetpack → Settings → Appearance.
This will add a “visibility” option to your widget panels.
Clicking the visibility button will bring up options allowing you to set conditions for when the widget should be shown or hidden. You can set visibility using several different conditions:
- Category
- Author
- User
- Role
- Tag
- Date
- Page
- Post Type
- Taxonomy
A live example
Let’s use my music site as an example of how you might want to use this functionality.
On annaditommaso.com, I have three footer widgets: A record widget, an upcoming gigs widget set to display only my next show, and a widget linking to a page offering custom design services. All three are visible on most pages:
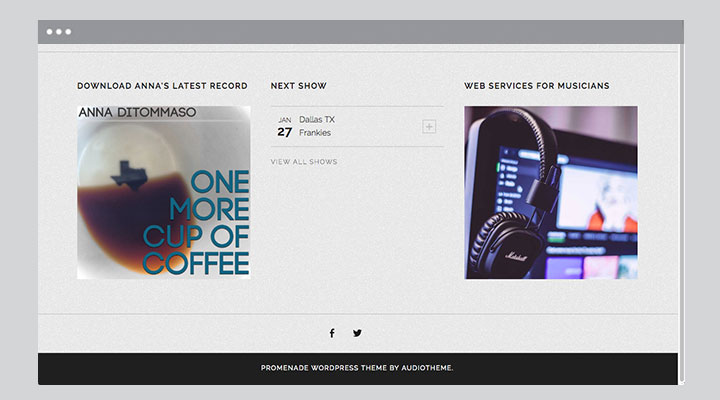
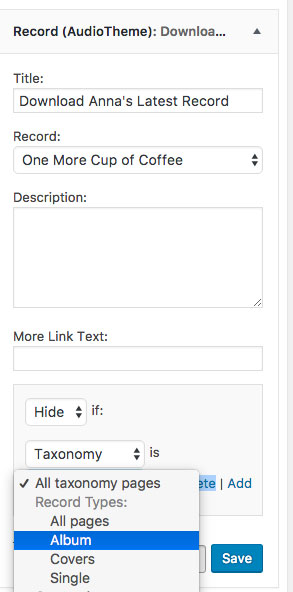
However, I don’t think it makes sense to display the Record widget, on the actual album’s page. I can use the conditional logic of the Widget Visibility module to prevent that widget from showing duplicate content on the album’s page.
To hide the record widget on the specific page, I’ll set the widget visibility to Hide if Taxonomy is Album.
Tip: I only have one album, so I can choose that record type without worrying about the widget being hidden on multiple album pages. If you have more than one, you will want to assign the record an additional album type that you’ll use only for that record. Remember, you can classify records under multiple record types.
The result of those conditions means that the widget is not visible on the record page it is advertising.
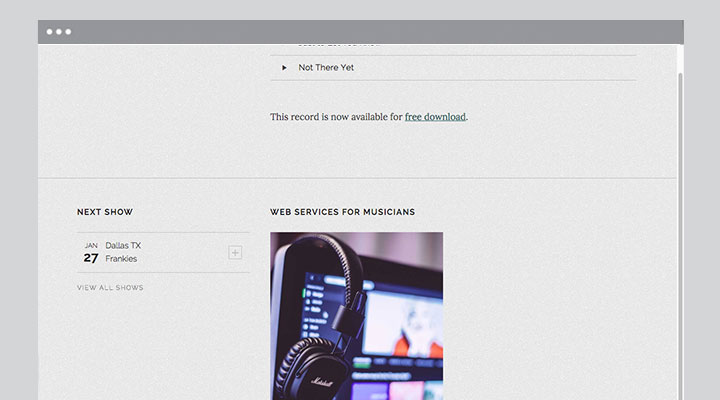
I could even add a blank widget (a text widget with only a space added to the content area) to separate those two widgets. To do this I would simple use the reverse of the visibility on that widget. In that case this would be Show if Taxonomy is Album.
The result:
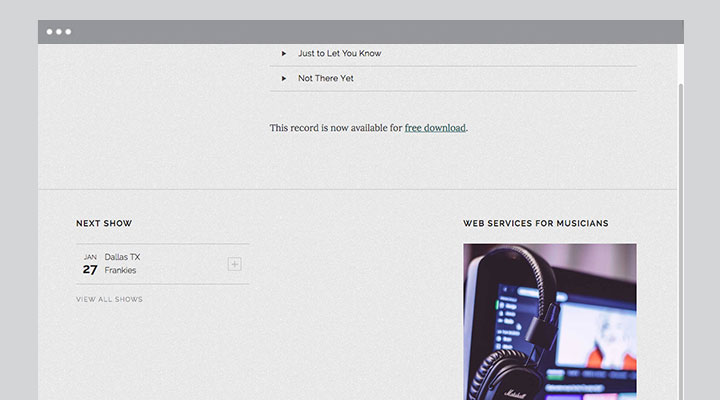
Hide your duplicate content
I can configure similar conditions to hide the other two widgets from specific pages as well.
For the upcoming gigs, I can use Hide if Post Type is Archive of Gig to hide the “Next Show” widget from my gigs archive.
For the custom services widget I can use Hide if Page is Web Services for Musicians to hide it from my custom services page.
I can also add a few more blank widgets to arrange the footer widgets the way I prefer. The results of these settings are clean pages with non-duplicative content.
Endless opportunities
The above examples were just a few of the ways you can utilize custom sidebars and widget visibility in WordPress. Don’t forget you can use the two plugins together.
Utilizing these two plugins can really give you more control to when and where your information is being shown. With a little time and thought, custom sidebars and widget visibility can add plenty of polish and depth to your site.
Do you have examples of using custom sidebars or widget visibility settings in WordPress? Share your thoughts in the comments section.
